

TL;DR
A film of fine droplets across the inside of an SUV tent—especially after a cool night with people sleeping inside—often points to condensation. Water repeatedly entering through one seam, damaged area or vehicle connection during rain points toward water ingress. These are clues, not a conclusive test: condensation can run to one spot and drip, and both problems can happen together.
- Trace the water to its first wet point before assuming the roof leaks.
- Check the vehicle sleeve, hatch area, doors and floor as well as the tent fabric.
- Maintain weather-protected airflow, separate wet gear from bedding, and keep intended air gaps open.
- For several rainy nights, prioritize usable ventilation, a correctly fitted vehicle connection, floor protection and a daily drying routine. A fabric waterproof rating alone cannot establish whole-tent performance.
You wake up to droplets overhead, a damp sleeping-bag edge or water beside the SUV’s cargo opening. Each needs attention, but the same repair will not solve all three. An SUV tent adds a vehicle connection to the usual tent roof, doors and floor, so finding where the water first appears matters more than where it finally lands.
This guide helps you separate moisture formed inside the shelter from water entering it, then build a practical routine for a wet weekend or a longer basecamp stay.
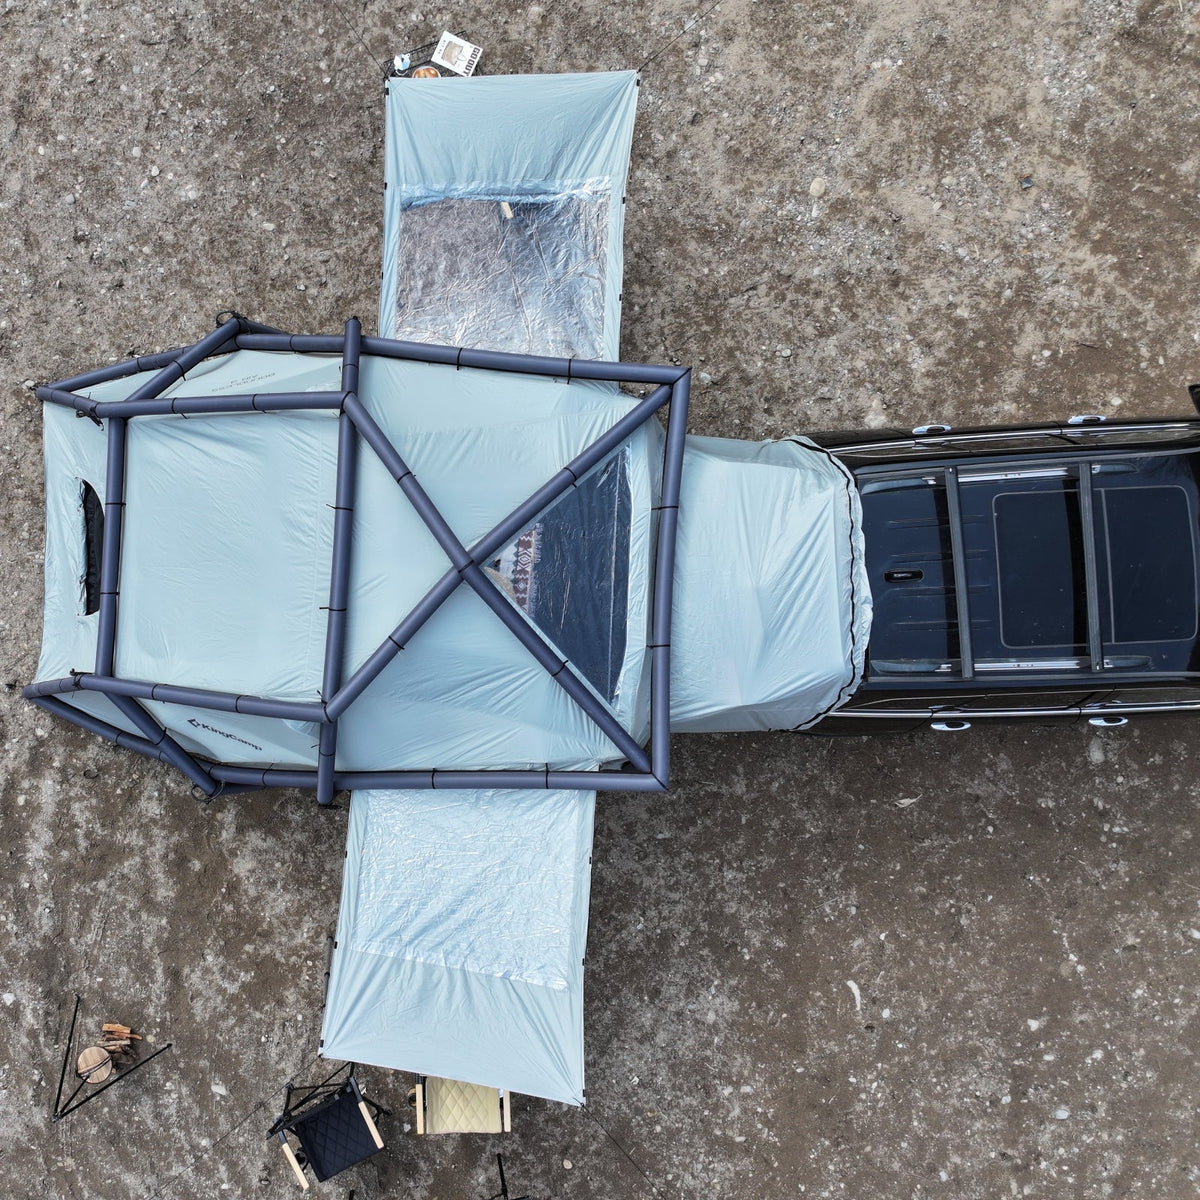
 Official KingCamp BOUNDLESS X3 Car Camping Tent photograph. The vehicle connection adds a separate area to inspect when tracing water; this image is not a rain-performance test.
Is the water condensation, a leak or rain entering an opening?
Condensation is water vapor becoming liquid on a cold surface; a leak is water passing through a place that should resist it. Rain can also enter an open door, an exposed vent or a gap around the vehicle sleeve without passing through the tent fabric. Wet gear and water carried in on shoes add another possibility.
In its condensation guidance, Cascade Designs identifies weather, occupants and wet surroundings as moisture sources and explains why ventilation helps. A waterproof outer surface can still have droplets on its inner face: resisting rain does not stop humid indoor air from meeting a cold panel.
Use the pattern below to decide what to inspect next. It is a troubleshooting guide, not a diagnosis from appearance alone.
| What you notice | What it may suggest | What to check next |
|---|---|---|
| Fine droplets over a broad inner roof or wall area after a cool night | Condensation | Occupancy, wet gear, closed vents and whether similar droplets occur when there has been no rain |
| A drip repeatedly appears along one seam during rain | A seam problem, or condensation collecting along the seam | Follow the wet trail above the drip; inspect the seam and adjacent panel |
| Water appears beside the hatch only while it rains | Runoff or wind-driven rain entering the connection | Sleeve overlap, gaps, straps, folds and the route water takes down the vehicle |
| A brief shower of droplets falls when the roof shakes | Condensation being dislodged is possible | Look for widespread beads underneath; do not assume rain has penetrated the coating |
| A wet patch develops where bedding touches a wall | Contact with an already wet surface | Move the bedding clear and inspect both sides of the contact area where accessible |
| Water pools near the doorway after repeated entries | Rain entry, drips from clothing or tracked-in water | Door position, wet footwear and where jackets are being handled |
| Water gathers at a floor edge or low corner | Surface runoff, floor/edge ingress or water flowing from elsewhere inside | Inspect outside drainage, floor condition and the route back to the first wet point |
A puddle can be the end of a water trail rather than its source. Dometic’s awning-tent manual explains that heavy condensation can run along interior surfaces and drip from fittings, resembling a leak. That is why “it drips from one place” is not enough evidence to condemn a seam.
A practical check while you are still at camp
First move bedding and vulnerable belongings away from the wet area. Photograph the pattern before wiping it away, and note whether it appeared overnight, during a gust, after opening the hatch or only during rainfall. Then gently dry a small accessible area and watch where moisture first returns.
If broad beading returns across cold panels, work on airflow and moisture sources. If you can see water crossing a connection gap or entering at a damaged seam, deal with that entry route as well. A successful ventilation adjustment does not prove that a suspected leak is repaired; similarly, tightening a sleeve does not remove humidity already inside.
For a recurring problem, send KingCamp close-up and wider photographs, the product name, vehicle make/model/year and a description of the weather and setup. Ask for the appropriate inspection or repair method before applying seam sealer, tape or a coating. Material compatibility matters, and indiscriminately coating the whole tent can obscure the original problem.
Why does an SUV connection make moisture harder to manage?
An open hatch makes the cargo area and tent part of a connected living space. Moisture can come from people sleeping in either area, damp jackets in the vehicle, wet bedding or gear moved between the two. Opening the hatch into a fully closed tent enlarges the indoor space; it does not, by itself, provide fresh-air exchange.
There are also more surfaces to inspect. The roof may be damp while the cargo threshold is dry, or the vehicle glass may fog while the tent fabric looks clear. Neither observation proves a defect. Treat the tent body, connection sleeve and cargo area as three inspection zones rather than assuming all water has the same origin.
 The official X3 interior photograph shows the connected cargo space. Keep the passage usable and inspect its edges separately from the tent roof.
Check the hatch connection during real rainfall
A sleeve can look tidy in dry weather while leaving a fold or edge that guides runoff inward. From a safe position, watch water moving down the vehicle and across the top and sides of the connection. Look for loose overlaps, pooled fabric and places where the fit changes when a door or hatch moves.
Make adjustments using the supplied attachment system and setup instructions. Do not block the vehicle’s drainage channels or improvise attachments around hot exhaust components, moving mechanisms or unsuitable trim. If you cannot maintain the intended overlap for your vehicle, ask for fitment guidance rather than treating a general “SUV compatible” description as confirmation.
Before a multi-night trip, practice with your actual vehicle, including any rear-mounted equipment that could interfere with the sleeve. Confirm that you can enter, exit and operate the intended tent closures without pulling the connection out of position. A product photograph of another SUV cannot settle those questions.
How should you ventilate a vehicle-connected tent in rain?
Keep an airflow route to the outdoors through openings that can remain protected from the weather. Adjust the route as wind and rain change, rather than either sealing every panel or leaving every door wide open. If an opening admits wind-driven rain, reduce that exposure while checking whether another intended vent can stay open.
The REI condensation guide connects ventilation with moisture-source control and appropriate pitching. For a vehicle-connected setup, apply that idea to the whole occupied space: a pile of damp clothing in the SUV still matters when the hatch is open to the tent.
Give incoming and outgoing air somewhere to go
Use separated openings where the tent design and weather allow. Cascade Designs’ ventilation advice recommends two open vents where possible and maintaining separation between the fly and body. Check the actual structure of your model; do not assume every tent has a full double-wall arrangement or the same vent layout.
Keep luggage and hanging towels from covering mesh or intended vents. Where there is an inner tent, pitch it as instructed and avoid pushing it against wet outer fabric. More open area is useful only if it creates a workable route and does not admit rain onto the sleeping area.
Transparent panels and mesh do different jobs
A transparent closed panel can admit daylight and provide a view without offering the airflow of exposed mesh. When a tent has layered doors, check which layer is actually open—not just whether you can see outside. Choose a weather-appropriate combination and revisit it when wind shifts.
On a cold night, retain warmth with suitable sleep insulation while maintaining the tent’s intended ventilation. Closing every opening to feel warmer can make the next morning’s moisture management harder. During persistent humid rain, even a well-ventilated setup may remain damp; plan to protect bedding and remove moisture rather than promising a completely dry inner surface.
Handle wet gear before bedtime
Create a wet-gear area near an appropriate entrance, away from sleeping equipment and the cargo bedding. Drain and wipe items before bringing them farther inside; use suitable waterproof containers for wet items during transport, then reopen them for drying when conditions allow. Hanging several soaked jackets inside overnight adds a drying load to the same air you are trying to manage.
A small battery fan may help circulate air, but it needs an open airflow route and a placement protected from water. It is not a dehumidifier and cannot fix an entry gap. Likewise, a small moisture-absorber tub is not a substitute for ventilation in an occupied tent open to humid outdoor air.
Keep combustion out of the drying plan. Do not run a combustion engine while the tent is connected, or use a camping stove or charcoal to dry the interior. The CPSC’s camping-equipment guidance documents the carbon-monoxide risk in tents and vehicles, while Napier’s SUV-tent guidance calls for the engine to be off. An open mesh door does not turn the connected shelter into a safe exhaust space.
What should an SUV tent offer for several rainy days?
Look for a complete wet-weather arrangement: ventilation usable in rain, a compatible connection, effective roof and floor coverage, secure pitching, and space to separate wet gear from dry bedding. Then check how you will inspect, detach and dry the system. A large interior or impressive fabric number cannot answer all those questions.
| Feature or buying question | Why it matters over several days | What to verify before the trip |
|---|---|---|
| Protected ventilation | People continue adding moisture while rain limits open-door time | Which openings can remain usable in the expected rain direction? |
| Vehicle-sleeve fit | The connection is another potential water-entry route | Does the intended overlap work on your exact hatch and body shape? |
| Rain cover, seams and closures | Rain protection depends on assembled details, not fabric alone | Are covers correctly positioned, seams sound and closures fully usable? |
| Floor and ground-layer design | Mud and runoff can reach the sleeping zone from below or an edge | Is the layer a sewn-in floor or a removable mat, and how are its edges protected? |
| Anchoring and supported roof shape | Poor tension can leave sagging or pooling areas | Can the supplied system be pitched correctly on the campsite surface? |
| Wet/dry zoning | Repeated entry can spread moisture through the living area | Where will boots, jackets, towels and bedding go? |
| Independent use when detached | A supply trip should not leave an unclosable vehicle opening | How does the tent close, and what must be disconnected before moving the car? |
| Repair and drying logistics | Small problems become more disruptive over repeated nights | Do you have model-compatible spares, instructions and a place to dry the kit afterward? |
A waterproof rating is not a rain-duration guarantee
A millimeter rating describes a specified fabric’s resistance to water pressure. It does not tell you how many rainy days a fully assembled vehicle-and-tent system will remain dry, nor does it establish performance at a zipper, sleeve, floor edge or damaged seam. Ratings also need a clear material and test context to support a meaningful comparison.
Treat claims such as “all-season,” “weatherproof” or “universal fit” as prompts for specific questions. Ask about the actual roof arrangement, vehicle fit, floor construction and conditions of use. No multi-day, whole-system rain test is being claimed for either KingCamp model in this article.
How the two KingCamp designs address these decisions
The KingCamp BOUNDLESS X3 Car Camping Tent uses a quick-opening frame and a more compact listed footprint. The KingCamp BOUNDLESS AIR3 Inflatable SUV Tent uses inflatable columns and a larger layout with separate bedroom and living areas. Those are useful differences in handling and organization; they do not establish that one produces less condensation or seals better to every SUV.
KingCamp BOUNDLESS X3 Car Camping Tent
The KingCamp BOUNDLESS X3 Car Camping Tent lists windows on three sides plus roof ventilation, giving you several openings to assess when planning airflow. Its detachable vehicle connector and independent-use configuration also matter if the vehicle needs to leave camp during a longer stay.
 Official X3 product view. Confirm which openings remain rain-protected in your setup; the vehicle shown is an illustration of use, not a fitment guarantee.
The published dimensions are 280 × 280 × 220 cm, with a listed weight of 12.35 kg and packed dimensions of 135 × 26 × 27 cm. The confirmed flysheet specification is 150D Oxford + PU3000mm, with a PE groundsheet. Its long packed shape is worth checking against the space left in your vehicle after bedding, food and other camp equipment are loaded.
For a family that wants a vehicle-connected living area without the larger AIR3 package, the X3 is a relevant option to examine. Before choosing it for prolonged rain, confirm the exact floor-edge construction and which ventilation openings can stay open with the rain cover fitted. Published features help you form the questions; a clear-day product photograph cannot answer them all.
KingCamp BOUNDLESS AIR3 Inflatable SUV Tent
The KingCamp BOUNDLESS AIR3 Inflatable SUV Tent lists separate bedroom and living areas, with the bedroom described as accommodating up to four people. That layout gives you a way to plan a wet-gear transition zone while reserving the sleeping space for dry equipment. A partition alone does not remove humidity or make the bedroom waterproof independently.
 Official AIR3 product view. The exterior crossed air columns distinguish it from the X3’s frame; no hidden construction or airflow performance is inferred from the photograph.
Its doors have mesh, TPU and cloth layers, and the page describes a removable rear connector and full-coverage mat. Remember that the transparent TPU layer is not the ventilating mesh layer. The listed mat is 210D Oxford with PU3000mm; because it is removable, confirm the installed edge arrangement rather than assuming a sewn-in bathtub floor.
The AIR3 measures 440 × 270 × 240 cm, weighs a listed 25 kg, and packs to 77 × 51 × 43 cm. Its larger layout may suit a basecamp routine with more time spent indoors, provided the pitch and vehicle have room for it. Confirm pump compatibility, the specified inflation pressure and approved repair supplies before travel; do not borrow an air-pressure setting from another inflatable tent.
 The official AIR3 gallery shows side doors extended as canopies. This illustrates usable layout, not a recommendation to leave canopies deployed in strong wind or driving rain.
Compare the facts that change your setup plan
| Published detail | KingCamp BOUNDLESS X3 Car Camping Tent | KingCamp BOUNDLESS AIR3 Inflatable SUV Tent |
|---|---|---|
| Setup dimensions | 280 × 280 × 220 cm | 440 × 270 × 240 cm |
| Listed weight | 12.35 kg | 25 kg |
| Packed dimensions | 135 × 26 × 27 cm | 77 × 51 × 43 cm |
| Main support | Quick-opening iron frame with fiberglass components | TPU inflatable columns with aluminum hallway poles |
| Airflow-related features | Three-sided windows and roof ventilation | Layered doors with mesh, TPU and cloth |
| Interior organization | Connected living space with storage details | Separate bedroom and living areas |
| Flysheet material and rating | 150D Oxford + PU3000mm | 210T polyester plaid cloth, PU3000mm |
| Floor/mat material | PE groundsheet | Removable 210D Oxford mat, listed PU3000mm |
| Vehicle connection | Detachable connector; independent use described | Removable rear connection cloth; standalone use described |
| Rain-planning question | How do the roof cover, openings and sleeve work together on your vehicle? | How do the door layers, removable mat and connection protect your planned dry zone? |
Specifications checked against the official product descriptions on September 21, 2026. These are manufacturer-listed figures, not independent measurements. Allow additional campsite space for the vehicle, access, anchoring and any deployed canopy.
The X3 flysheet specification is 150D Oxford + PU3000mm. This material rating does not establish how the complete tent, floor and vehicle connection will perform through several days of rain. Neither product page establishes a condensation-free result or verified fit on every vehicle.
A routine for the first night, the next morning and day three
The aim of a multi-day routine is to keep new moisture from accumulating faster than you can manage it. Make small checks throughout the stay rather than waiting for a soaked sleeping bag to force a full reset.
Before the first rain: choose a permitted, well-drained pitch away from visible runoff routes. Fit and anchor the tent as directed, install the rain cover correctly, inspect the connection, and assign separate places for wet and dry gear. Keep any ground layer within the intended coverage so exposed edges do not collect rain underneath. Locate the ventilation controls before darkness or bad weather makes them awkward to find.
Before sleep: check the current wind direction, adjust protected openings, and move damp clothing away from the bedroom and cargo bedding. Make sure luggage is not pressing against a wet wall or covering mesh. Wipe accessible accumulated water with a clean absorbent cloth and put the wet cloth in the wet-gear area rather than leaving it on a sleeping bag.
The next morning: identify what became wet and when. Broad roof droplets, a single cargo-side trail and wet boots at the door call for different responses. Photograph any repeatable entry point. Use a suitable break in the rain to air bedding and expose damp surfaces, while continuing to protect them from new rainfall.
Before leaving the vehicle space unattended: follow the model’s disconnection steps, release every vehicle attachment, and close and secure the tent opening before moving the car. Recheck the fit after reconnecting; the earlier arrangement may not reproduce itself exactly.
By the second or third wet day: assess whether you still have dry bedding, a usable floor and a reliable way to control water entry. More space and mesh cannot compensate for an unsuitable site, a damaged shelter or worsening conditions. If you cannot maintain a dry sleeping arrangement, use another suitable shelter or change the trip plan rather than relying on the product’s waterproof label.
Questions that come up once the tent is pitched
Can condensation happen even when it never rains?
Yes. An occupied shelter can develop condensation on a cool, rain-free night. Record overnight conditions and the moisture pattern rather than using rainfall as the only diagnostic clue. Conversely, water during rain can still include condensation, so the two causes are not mutually exclusive.
Will vehicle climate control dry the whole attached tent?
Do not assume that it will. A vehicle’s climate system is designed around the vehicle cabin, and an open connection changes the space it would have to condition. This article does not claim verified compatibility or drying performance for any vehicle camping mode. Follow the vehicle’s instructions, and never run a combustion engine to heat or dry the connected shelter.
Should I waterproof the tent again as soon as I see droplets?
No. First establish whether you are seeing condensation, water through an opening, or a material/seam problem. A new coating will not remove humid indoor air or correct sleeve fit. For a suspected material failure, document the location and ask for a repair product and method compatible with the tent.
What if everything must be packed wet for the drive home?
Treat that packing as transport. Keep wet items from soaking dry bedding, then reopen the tent, connector, mat and bags to dry fully when you reach a suitable place. The end of the drive is the start of drying, not the start of long-term storage.
Water inside an SUV tent is a reason to trace the source, not an automatic verdict on the fabric. Start with where and when it appears, check the vehicle connection separately, and choose a rain-day setup you can ventilate, inspect and dry throughout the trip.
Share:
What Does a Tent Waterproof Rating Actually Tell You?
210 vs. 340 GSM Polycotton Tents: What Really Changes?